Thoracic Paravertebral Block
|
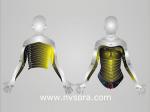
Figure 1: Thoracic paravertebral block Essentials
General Considerations A thoracic paravertebral block is a technique where a bolus of local anesthetic is injected in the paravertebral space, in the vicinity of the thoracic spinal nerves following their emergence from the intervertebral foramen. The resulting ipsilateral somatic and sympathetic nerve blockade produces anesthesia or analgesia that is conceptually similar to a "unilateral" epidural anesthetic block. Higher or lower levels can be chosen to accomplish a unilateral, bandlike, segmental blockade at the desired levels without significant hemodynamic changes. For a trained regional anesthesia practitioner, this technique is simple to perform and time efficient; however, it is more challenging to teach because it requires stereotactic thinking and needle maneuvering. A certain "mechanical" mind or sense of geometry is necessary to master it. This block is used most commonly to provide anesthesia and analgesia in patients having mastectomy and cosmetic breast surgery, and to provide analgesia after thoracic surgery or in patients with rib fractures. A catheter can also be inserted for continuous infusion of local anesthetic. Regional Anesthesia Anatomy The thoracic paravertebral space is a wedge-shaped area that lies on either side of the vertebral column (Figure 2). Its walls are formed by the parietal pleura anterolaterally; the vertebral body, intervertebral disk, and intervertebral foramen medially; and the superior costotransverse ligament posteriorly. After emerging from their respective intervertebral foramina, the thoracic nerve roots divide into dorsal and ventral rami. The dorsal ramus provides innervation to the skin and muscle of the paravertebral region; the ventral ramus continues laterally as the intercostal nerve. The ventral ramus also gives rise to the rami communicantes, which connect the intercostal nerve to the sympathetic chain. The thoracic paravertebral space is continuous with the intercostal space laterally, epidural space medially, and contralateral paravertebral space via the prevertebral fascia. In addition, local anesthetic can also spread longitudinally either cranially or caudally. The mechanism of action of a paravertebral blockade includes direct action of the local anesthetic on the spinal nerve, lateral extension along with the intercostal nerves and medial extension into the epidural space through the intervertebral foramina.
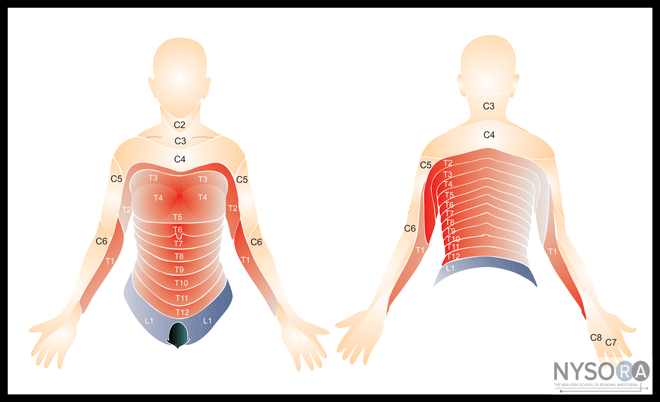
Figure 2: Anatomy of the thoracic spinal nerve (root) and innervation of the chest wall. Distribution of Blockade Thoracic paravertebral blockade results in ipsilateral anesthesia. The location of the resulting dermatomal distribution of anesthesia or analgesia is a function of the level blocked and the volume of local anesthetic injected (Figure 3). Single Injection Thoracic Paravertebral Block Equipment A standard regional anesthesia tray is prepared with the following equipment:
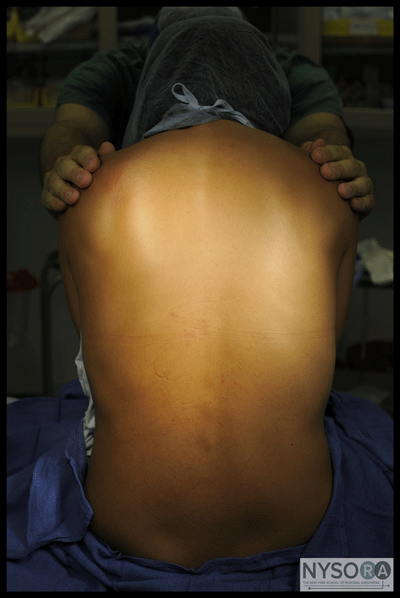
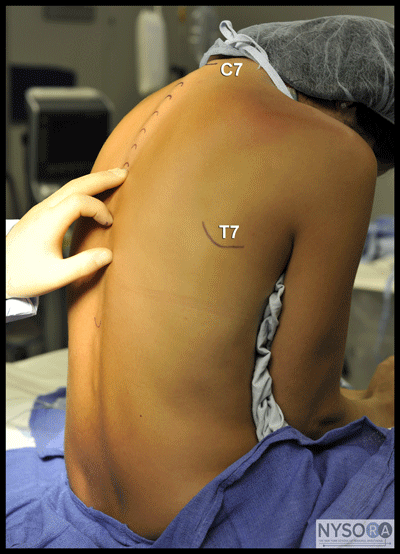
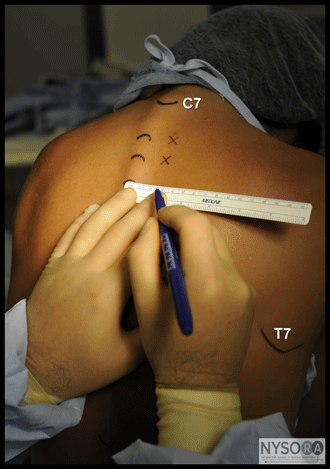
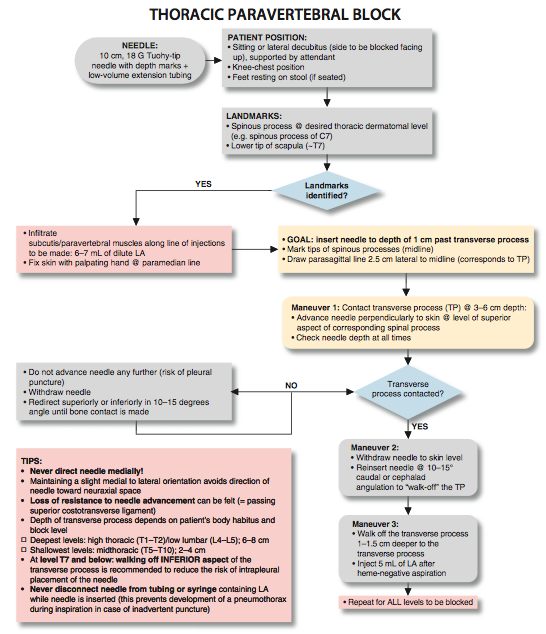
Patient Positioning The patient is positioned in the sitting or lateral decubitus (with the side to be blocked uppermost) position and supported by an attendant (Figure 4). The back should assume knee-chest position, similar to the position required for neuraxial anesthesia. The patient's feet rest on a stool to allow greater patient comfort and a greater degree of kyphosis. The positioning increases the distance between the adjacent transverse processes and facilitates advancement of the needle between them. Landmarks and Maneuvers to Accentuate Them The following anatomic landmarks are used to identify spinal levels and estimate the position of the relevant transverse processes (Figure 5): 1. Spinous processes (midline) 2. Spinous process C7 (the most prominent spinous process in the cervical region when the neck is flexed) 3. Lower tips of scapulae (corresponds to T7)
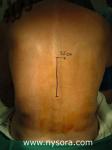
Figure 3: Thoracic dermatomal levels. The tips of the spinous processes should be marked on the skin. Then a parasagittal line can be measured and drawn 2.5 cm lateral to the midline (Figure 6). For breast surgery, the levels to be blocked are T2 through T6. For thoracotomy, estimates can be made after discussion with the surgeon about the planned approach and length of incision.
Technique After cleaning the skin with an antiseptic solution, 6 to 10 mL of dilute local anesthetic is infiltrated subcutaneously along the line where the injections will be made. The injection should be carried out slowly to avoid pain on injection.
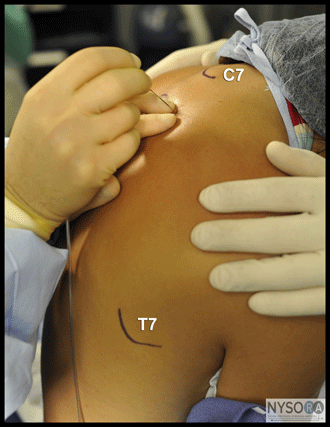
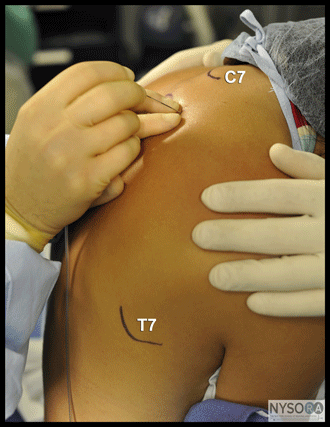
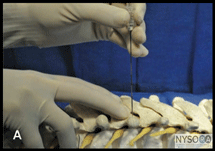
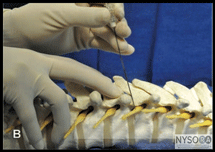
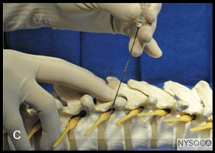
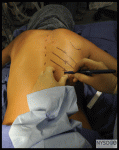
The subcutaneous tissues and paravertebral muscles are infiltrated with local anesthetic to decrease the discomfort at the site of needle insertion. The fingers of the palpating hand should straddle the paramedian line and fix the skin to avoid medial-lateral skin movement. The needle is attached to a syringe containing local anesthetic via extension tubing and advanced perpendicularly to the skin at the level of the superior aspect of the corresponding spinous process (Figure 7). Constant attention to the depth of needle insertion and the slight medial to lateral needle orientation is critical to avoid pneumothorax and direction of the needle toward the neuraxial space, respectively. The utmost care should be taken to avoid directing the needle medially (risk of epidural or spinal injection). The transverse process is typically contacted at a depth of 3 to 6 cm. If it is not, it is possible the needle tip has missed the transverse processes and passed either too laterally or in between the processes. Osseous contact at shallow depth (e.g., 2 cm) is almost always due to a too lateral needle insertion (ribs). In this case, further advancement could result in too deep insertion and possible pleural puncture. Instead, the needle should be withdrawn and redirected superiorly or inferiorly until contact with the bone is made. After the transverse process is contacted, the needle is withdrawn to the skin level and redirected superiorly or inferiorly to "walk off" the transverse process (Figure 8A and B). The ultimate goal is to insert the needle to a depth of 1 cm past the transverse process. A certain loss of resistance to needle advancement often can be felt as the needle passes through the superior costotransverse ligament; however, this is a nonspecific sign and should not be relied on for correct placement.
Figure 8: (A) Once the transverse process is contacted, the needle is walked-off superiorly or inferiorly and advanced 1-1.5 cm past the transverse process. (B) When walking-off the transverse process superiorly proves difficult, the needle is redirected to walk off inferiorly. The needle can be redirected to walk off the transverse process superiorly or inferiorly. At levels of T7 and below, however, walking off the inferior aspect of the transverse process is recommended to reduce the risk of intrapleural placement of the needle. Proper handling of the needle is important both for accuracy and safety. Once the transverse process is contacted, the needle should be re-gripped 1 cm away from the skin so that insertion only can be made 1 cm deeper before skin contact with the fingers prevents further advancement. After aspiration to rule out intravascular or intrathoracic needle tip placement, 5 mL of local anesthetic is injected slowly (Figure 10). The process is repeated for the remaining levels to be blocked.
Figure 9: Demonstration of the technique of walking-off the transverse process and needle redirection maneuvers to enter the paravertebral space (lightly shaded area) containing thoracic nerve roots. A. Needle contacts transverse process. B. Needle is "walked off" cephalad to reach paravertebral space. C. Needle is "walked off" to reach paravertebral space.
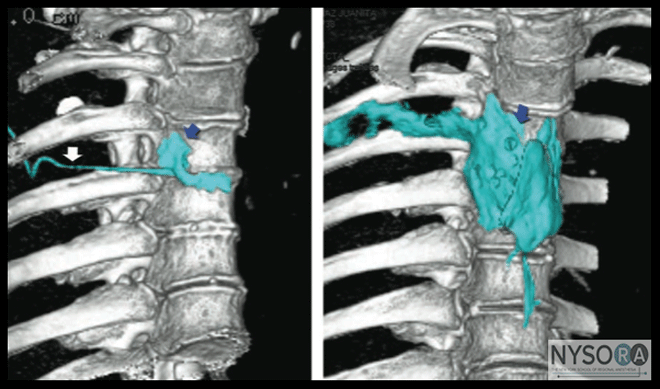
Figure 10: The spread of the contrast-containing local anesthetic in the paravertebral space. White arrow-paravertebral catheter, blue arrows-spread of the contrast. In right image example (5 ml), the contrast spreads somewhat contralaterally and one level above and below the injection. Table 1: Choice of Local Anesthetic for Paravertebral Block 
Choice of Local Anesthetic It is usually beneficial to achieve longer-acting anesthesia or analgesia in a thoracic paravertebral blockade by using a long-acting local anesthetic. Unless lower lumbar levels (L2 through L5) are part of the planned blockade, paravertebral blocks do not result in extremity motor block and do not impair the patient's ability to ambulate or perform activities of daily living. Table 1 lists some commonly used local anesthetic solutions and their dynamics with this block. Block Dynamics and perioperative Management 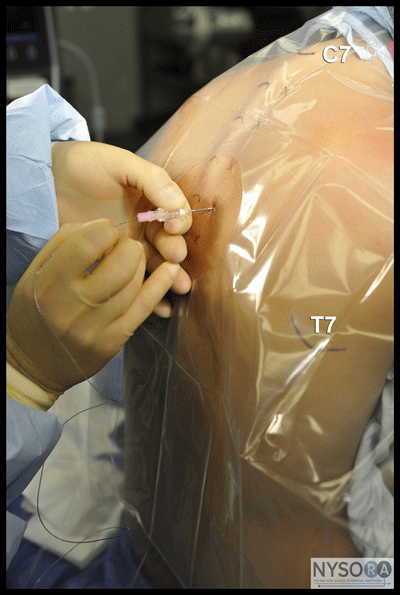 Figure 11: Continuous thoracic paravertebral block. The catheter is inserted 3 cm past the needle tip. Placement of a paravertebral block is associated with moderate patient discomfort, therefore adequate sedation (midazolam 2-4 mg) is necessary for patient comfort. We also routinely administer alfentanil 250 to 750 µg just before beginning the block procedure. However, excessive sedation should be avoided because positioning becomes difficult when patients cannot keep their balance in a sitting position. The efficacy of the block depends on the dispersion of the anesthetic within the space to reach the individual roots at the level of the injection. The first sign of the block is the loss of pinprick sensation at the dermatomal distribution of the root being blocked. The higher the concentration and volume of local anesthetic used, the faster the onset. Continuous Thoracic Paravertebral Block Continuous thoracic paravertebral block is an advanced regional anesthesia technique. Except for the fact that a catheter is advanced through the needle, however, it differs little from the single-injection technique. The continuous thoracic paravertebral block technique is more suitable for analgesia than for surgical anesthesia. The resultant blockade can be thought of as a unilateral continuous thoracic epidural, although bilateral epidural block after injection through the catheter is not uncommon. This technique provides excellent analgesia and is devoid of significant hemodynamic effects in patients following mastectomy, unilateral chest surgery or patients with rib fractures. Equipment A standard regional anesthesia tray is prepared with the following equipment:
Patient Positioning The patient is positioned in the supine or lateral decubitus position. In our experience, this block is used primarily for patients after various thoracic procedures or for patients undergoing a mastectomy or tumorectomy with axillary lymph node debridement. The ability to recognize spinous processes is crucial. Landmarks The landmarks for a continuous paravertebral block are identical to those for the single-injection technique. The tips of the spinous processes should be marked on the skin. A parasagittal line can then be measured and drawn 2.5 cm lateral to the midline.
Technique The subcutaneous tissues and paravertebral muscles are infiltrated with local anesthetic to decrease the discomfort at the site of needle insertion. The needle is attached to a syringe containing local anesthetic via extension tubing and advanced in a sagittal, slightly cephalad plane to contact the transverse process. Once the transverse process is contacted, the needle is withdrawn back to the skin level and reinserted cephalad at a 10° to 15° angle to walk off 1 cm past the transverse process and enter the paravertebral space. As the paravertebral space is entered, a loss of resistance is sometimes perceived, but it should not be relied on as a marker of correct placement. Once the paravertebral space is entered, the initial bolus of local anesthetic is injected through the needle. The catheter is inserted about 3 to 5 cm beyond the needle tip (Figure 11). The catheter is secured using an adhesive skin preparation, followed by application of a clear dressing and clearly labeled "paravertebral nerve block catheter." The catheter should be loss of resistance checked for air, cerebrospinal fluid, and blood before administering a local anesthetic or starting a continuous infusion.
Management of the Continuous Infusion Continuous infusion is initiated after an initial bolus of dilute local anesthetic is administered through the needle or catheter. The bolus injection consists of a small volume of 0.2% ropivacaine or bupivacaine (e.g., 8 mL). For continuous infusion, 0.2% ropivacaine or 0.25% bupivacaine (levobupivacaine) is also suitable. Local anesthetic is infused at 10 mL/h or 5 mL/h when a patient-controlled regional analgesia dose (5 mL every 60 min) is planned.
Complications and how to Avoid Them Table 2 lists the complications and preventive techniques of thoracic paravertebral block. Table 2: Complications of Thoracic Paravertebral Block and Preventive Techniques  <br/ ><br/ > <br/ ><br/ >
|
| 02/20/2016(+ 2016 Dates) | |
| 01/27/2016 | |
| 03/17/2016 | |
| 04/20/2016 | |
| 09/23/2016 | |
| 10/01/2024 |
![[advertisement] gehealthcare](../../../files/banners/banner1_250x600/GEtouch(250X600).gif)

![[advertisement] concertmedical](../../../files/bk-nysora-ad.jpg)







Post your comment