Infraclavicular Brachial Plexus Block
|
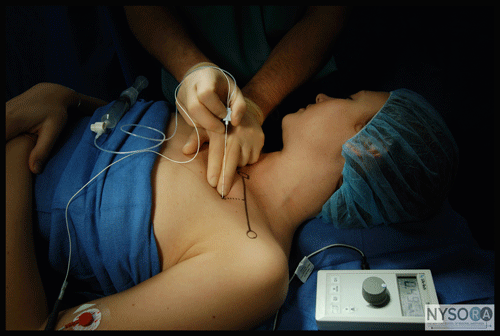
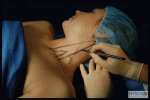
Figure 1: Patient position and needle insertion for infraclavicular brachial plexus block. Essentials
General Considerations The infraclavicular block is a method of accomplishing brachial plexus anesthesia below the level of the clavicle. Experience with basic brachial plexus techniques and understanding of the anatomy of the infraclavicular fossa and axilla is necessary for its safe and efficient implementation. This block is well suited for hand, wrist, elbow, and distal arm surgery. It also provides excellent analgesia for an arm tourniquet. Infraclavicular block is functionally similar to supraclavicular block, therefore the two techniques are often used interchangeably, depending on whether the patient's anatomy is more conducive to one or the other. Table 1: Distribution of the Branches of the Brachial Plexus 
Functional Anatomy The infraclavicular block is performed below the clavicle, where the axillary vessels and the cords of the brachial plexus lie deep to the pectoralis muscles, just inferior and slightly medial to the coracoid process. The boundaries of the space are the pectoralis minor and major muscles anteriorly, ribs medially, clavicle and the coracoid process superiorly, and humerus laterally. The connective tissue sheath surrounding the plexus also contains the axillary artery and vein. Axillary and musculocutaneous nerves may leave the common tissue sheath at or before the coracoid process in 50% of patients (Table 1 and Figure 2). Consequently, deltoid and biceps twitches should not be accepted as reliable signs of infraclavicular brachial plexus identification. The important anatomic structures are exposed in Figure 3. Distribution of Blockade The typical distribution of anesthesia following an infraclavicular brachial plexus block includes the hand, wrist, forearm, elbow, and distal arm (Figure 4). The skin of the axilla and proximal medial arm (unshaded areas) are not anesthetized (intercostobrachial nerve).
Figure 2: Functional organization of the brachial plexus into trunks, divisions, and cords. Single Injection Infraclavicular Block 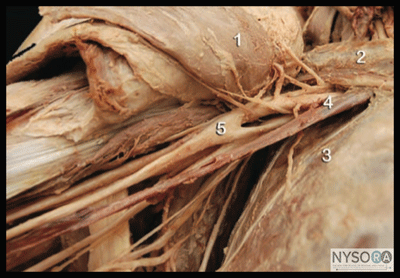
Figure 3: Anatomy of the infraclavicular fossa. Shown are retracted pectoralis muscles (1), clavicle (2), chest wall (3), axillary (subclavian) artery and vein (4) and brachial plexus "wrapped" around the artery (5). Equipment A standard regional anesthesia tray is prepared with the following equipment:
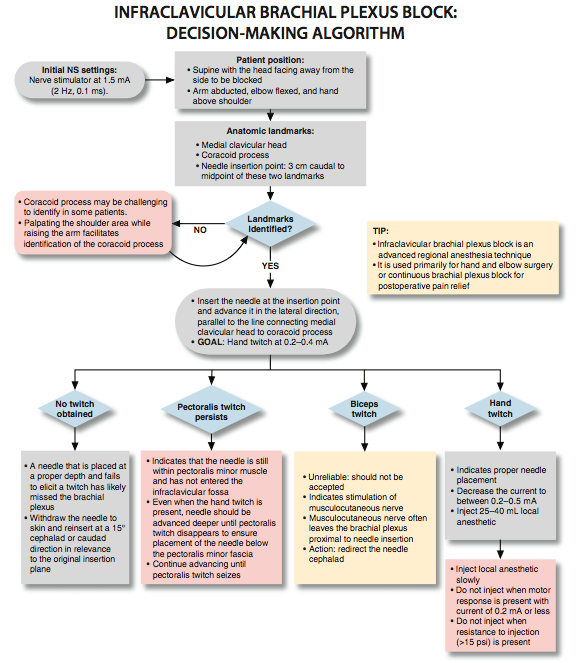
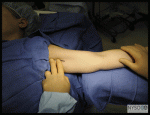
Landmarks and Patient Positioning The patient is in the supine position with the head facing away from the side to be blocked. The anesthesiologist also stands opposite the side to be blocked to assume an ergonomic position during the block performance. It may be beneficial to keep the patient's arm abducted and flexed at the elbow to keep the relationship of the landmarks to the brachial plexus constant. After a certain level of comfort with the technique is reached, the arm can be in any position during the block performance. The arm should be supported at the wrist to allow a clear, unobstructed view and interpretation of twitches of the hand.
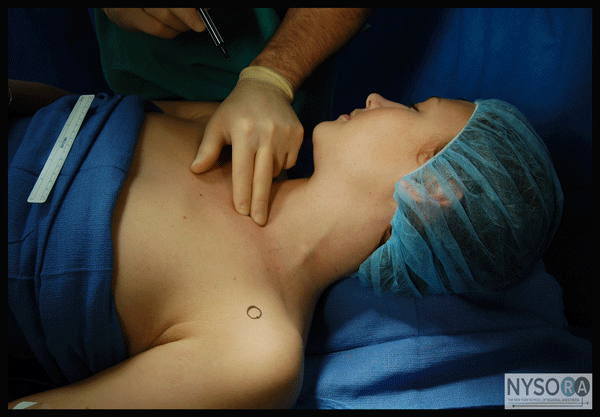
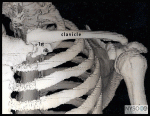
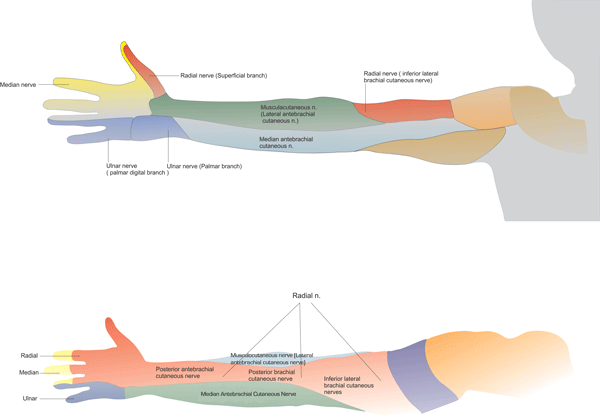 Figure 4: Distribution of sensory blockade with infraclavicular brachial plexus block. The following landmarks are useful in estimating the site for an infraclavicular block: 1. Coracoid process (Figure 5) 2. Medial clavicular head (Figure 6) 3. Midpoint of line connecting landmarks 1 and 2
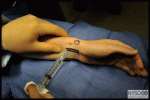
The needle insertion site is marked approximately 3 cm caudal to the midpoint of landmark 3 (Figure 7) An X-ray film demonstrates the relevant anatomy (Figure 8): 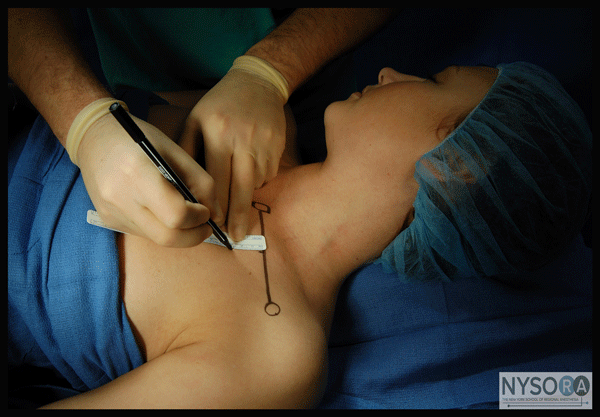
Figure 7: Needle insertion point for infraclavicular brachial plexus block. The medial and lateral circles outline the sternal head of the clavicle and coracoid process, respectively. 1. Coracoid procoess 2. Clavicle 3. Humerus 4. Scapula 5. Rib cage
Technique 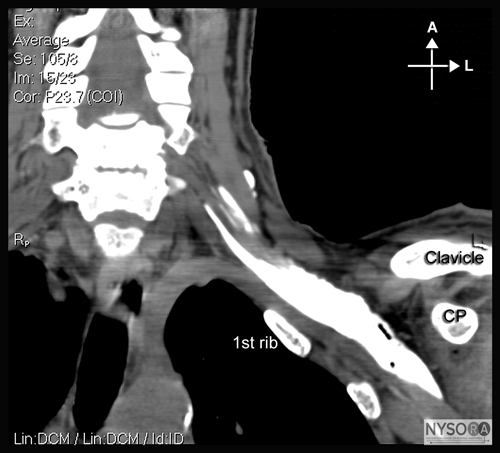
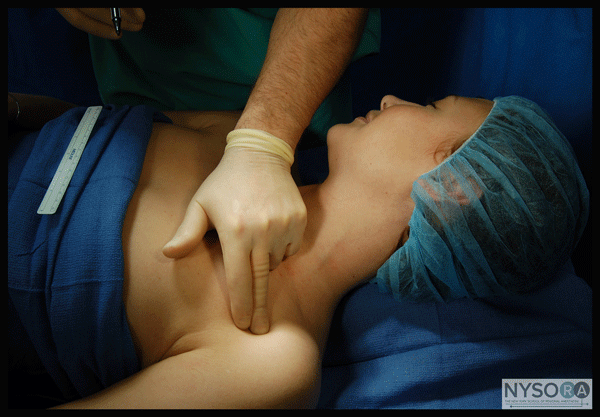
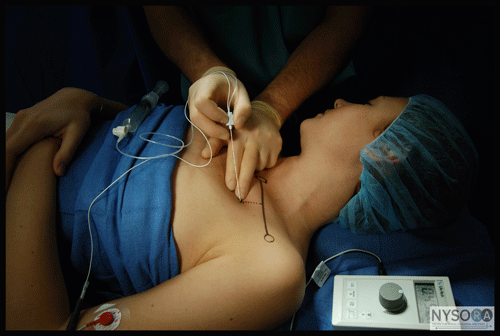
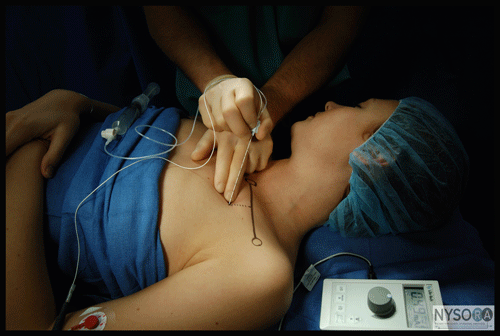
Figure 8: Osseous prominences of significance to infraclavicular brachial plexus block and relationship to the chest wall. Shown also is distribution of the local anesthetic underneath the clavicle after injection of the contrast-containing local anesthetic. The needle insertion site is infiltrated with local anes- thetic using a 25-gauge needle. Local anesthetic should also be infiltrated deeper into the pectoralis muscle to decrease discomfort during needle insertion through the muscle layers. A 10-cm, 21-gauge insulated needle, attached to a nerve stimulator, is inserted at a 45° angle to the skin and advanced parallel to the line connecting the medial clavicular head with the coracoid process (Fig. 1). The nerve stimulator is initially set to deliver 1.5 mA. A local twitch of the pectoralis muscle is typically elicited as the needle is advanced beyond the subcutaneous tissue. Once these twitches disappear, the needle advancement should be slow and methodical while the patient is observed for motor responses of the brachial plexus. When insertion of the needle does not result in brachial plexus stimulation, the following maneuvers should be undertaken: 1. Keep the palpating hand in the same position, with the palpating finger firmly seated in the pectoralis and the skin between the fingers stretched (Figure 9A). 2. Withdraw the needle to skin level, redirect it 10 degrees cephalad, and repeat the procedure (Figure 9B). 3. Withdraw the needle from the skin, redirect it 10 degrees caudal, and repeat the procedure (Figure 9C). If these maneuvers fail to result in a motor response, withdraw the needle and reassess the landmarks. Assure that the nerve stimulator is properly connected and delivering the set stimulus. Insert the needle 2 cm laterally and repeat the preceding steps. To the front of the medial trunk (biceps, triceps, pectoralis twitch) on its way to the lower trunk (fingers twitch).
Troubleshooting Table 2 lists some common responses to nerve stimulation and the course of action needed to obtain the proper response. Block Dynamics and Perioperative Management Adequate sedation and analgesia are crucial during nerve localization to ensure patient comfort and to facilitate the interpretation of responses to nerve stimulation. For instance, midazolam 2 to 6 mg intravenously (IV) can be used to achieve sedation. Because the needle passage through the pectoralis muscle is moderately painful, a short-acting narcotic (e.g., alfentanil 250-750 µg) is added just before needle insertion. A typical onset time for this block is 15 to 20 minutes, depending on the local anesthetic chosen. Waiting beyond 20 minutes will not result in further enhancement of the blockade. The first sign of an impending successful blockade is loss of muscle coordination within minutes after the injection. This loss can be easily tested by asking the patient to touch the nose, paying close attention that they do not injure an eye. The loss of motor coordination typically occurs before sensory blockade can be documented. In case of inadequate skin anesthesia, despite the apparently timely onset of the block- ade, local infiltration by the surgeon at the site of the incision is often all that is needed to allow the surgery to proceed. Continuous Infraclavicular Block A continuous infraclavicular block is an advanced regional anesthesia technique, and adequate experience with the single-injection technique is necessary for its safe, successful implementation. The use of a catheter significantly increases the utility of an infraclavicular block. The brachial plexus is encountered at a relatively deep location, which decreases the chance of inadvertent catheter dislodgment. Additionally, the catheter insertion site is easily approached for maintenance and inspection. This technique can be used for surgery on the hand, wrist, elbow, or distal arm and for surgery at the same anatomic location requiring prolonged postoperative pain management, repeated procedures (e.g., debridement) or a sympathetic block.
Table 2: Common Problems During Nerve Localizaitons and Corrective Actions  Equipment A standard regional anesthesia tray is prepared with the fol- lowing equipment:
The block technique is very similar to that in the single- injection block. The brachial plexus localization is begun with a current of 1.5 mA, similarly to the single-injection technique. Once the motor response of the hand is obtained with a current of 0.5 mA, 5 to 10 mL of local anesthetic is injected and the catheter is inserted approximately 3 to 5 cm is beyond the tip of the needle. When the stimulating catheter is used, solution of dextrose in water (D5W) is used instead to allow electrolocation through the catheter. The needle is then withdrawn, the catheter secured, and the remaining volume of the planned dose of the local injected via the catheter. When a stimulating catheter is used, the catheter is manipulated with the nerve stimula- tor connected until the desired motor response is obtained with <1.0 mA. Landmarks and Patient Positioning The patient is in the same position as for the single-injection technique (Fig. 1). However, the anesthesiologist must be in an ergonomic position to allow for maneuvering during catheter insertion. It is also important that all the equipment, including the catheter, be immediately available and prepared in advance because small movements of the needle while trying to prepare the catheter may result in dislodging the needle from its position in the brachial plexus sheath. Maneuvers to Facilitate Landmark Identification The landmarks are the same as for the single-injection technique: 1. Medial clavicular head 2. Coracoid process 3. Midpoint of the line connecting landmarks 1 and 2 Elevating and raising the arm while palpating for the bony prominence of the coracoid process determines the exact location of the coracoid process. The point of needle insertion is labeled 3 cm caudal to the midpoint between the medial clavicular head and the coracoid process.
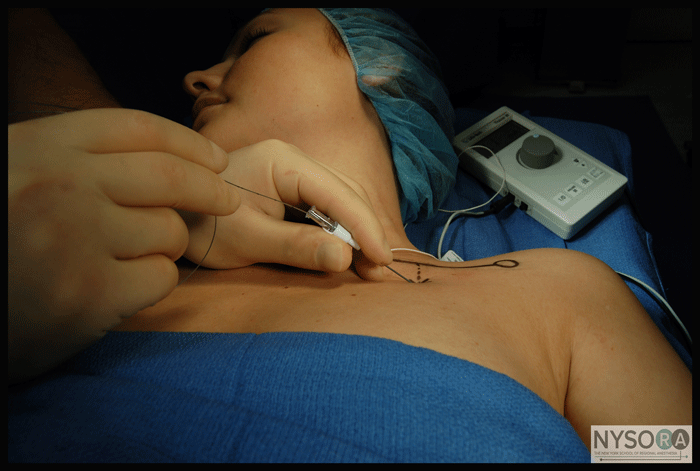
Figure 10: Needle position and catheter insertion in continuous infraclavicular block. Technique The skin and subcutaneous tissue at the projected site of needle insertion is anesthetized with local anesthetic. Local infiltration of the skin, subcutaneous tissue, and the pectoralis muscles makes the procedure more comfortable for the patient. The block needle is then attached to the nerve stimulator (1.5 mA, 2 Hz). The fingers of the palpating hand should be firmly positioned on the pectoralis muscle and the needle inserted at a 45° angle to the horizontal plane and approximately parallel to the medial clavicular head-coracoid process line (Figure 10). As the needle is advanced beyond the subcutaneous tissue, direct stimulation of the pectoralis muscle is obtained as the needle passes through the muscle. Stimulation of the brachial plexus is encountered after the pectoralis muscle twitches cease. The desired response is that of the posterior cord, indicated by extension of the wrist and fingers at a current of 0.2 to 0.5 mA. The catheter tip should be advanced no more than 5 cm beyond the needle tip. To prevent it from being dislodged, the needle is carefully withdrawn as the catheter is simultaneously advanced. The most important aspect of this technique is stabilization of the needle for catheter insertion after the brachial plexus is localized.
The catheter is checked for inadvertent intravascular placement and secured to the chest using an adhesive skin preparation such as benzoin, followed by application of a clear dressing. The infusion port should be clearly marked "continuous nerve block." Management of the Continuous Infusion 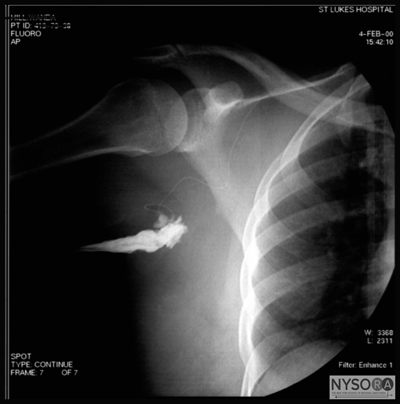
Figure 11: Disposition of radiopaque dye in the brachial plexus sheath after the injection of 2 mL through an infraclavicular catheter. The dye is seen descending into the axillary brachial plexus sheath, a testimony to the continuous nature of the brachial plexus sheath. The catheter is activated by injecting a bolus of local anesthetic (20-25 mL) followed by an infusion at 5 mL/h and patient-controlled regional analgesia (PCRA) dose of 5 mL/h (Figure 11). For continuous infusion, we typically use 0.2% ropivacaine. Other adjuvants do not appear to be of benefit in continuous nerve blocks, such as clonidine, epinephrine, or opioids. Patients should be seen and instructed on the use of PCRA at least once a day. During each visit, the insertion site should be checked for erythema and swelling and the extent of motor and sensory blockade documented. The infusion regimen should then be adjusted accordingly. When the patient complains of breakthrough pain, the extent of the sensory block should be checked first. A bolus of dilute local anesthetic (e.g., 10-15 mL of 0.2% ropivacaine) can be injected to reactivate the catheter. Increasing the infusion rate alone never results in improvement of analgesia. When the bolus fails to result in blockade after 30 minutes, the catheter should be considered to have migrated and should be removed. As with all continuous nerve block infusion, patients must be prescribed an immediately available alternative pain management protocol because incomplete analgesia and catheter dislodgment can occur. Table 3 lists possible complica- tions with infraclavicular block and methods to reduce the risk of the complications.
Table 3: Complications and How to Avoid Them 
|
| 12/19/2015(+ 2016 Dates) | |
| 01/27/2016 | |
| 03/17/2016 | |
| 04/20/2016 | |
| 09/24/2016 | |
| 10/01/2024 |
![[advertisement] gehealthcare](../../../files/banners/banner1_250x600/GEtouch(250X600).gif)

![[advertisement] concertmedical](../../../files/bk-nysora-ad.jpg)








Post your comment